I wanted to give Noey’s lovely teachers something to thank them for their work over the past year, and I wanted it to be something that Noey could help to make. Given that it is the end of year, with Christmas approaching, this is what we came up with:
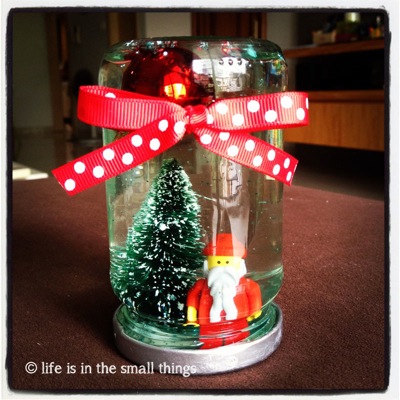
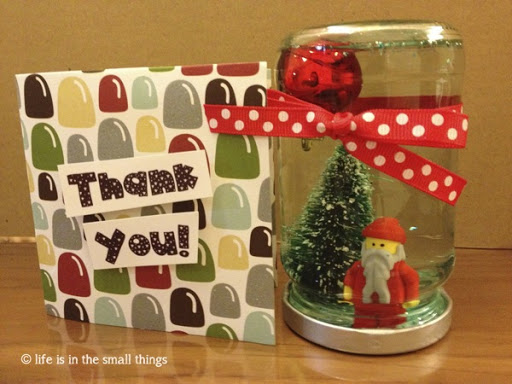
Homemade snow globes! Created out of old jar jars and made possible by the generous contribution of Lego Santa/Gnome by our in-house Lego supplier (aka Papa).
Noey had been asking to make a snow globe after seeing it done on, erm, Special Agent Oso on TV a few months back and I figured this was as good an opportunity to make them as we would have. It wasn’t exactly a 3-step process, but it was fairly easy.
What you need:
- A clean, empty, transparent glass jar with a lid that can be screwed on tightly
- Some decorative figurines or ornaments
- Hot glue
- Silver glitter
- Water
- Enamel paint (optional)
- Decorative ribbon (optional)
How to make your own snow globe:
1. Grab your glass jar and make sure it’s clean and clear. If you need to get labels off it, a good method is just to soak the jar in soapy water overnight. The labels should come right off the next day, and if they don’t, a good scrub with a scrubbing sponge should do the trick.
2. Paint the lid of the jar with some enamel paint if you want it a different colour. I had some leftover silver paint and was very happy to have the opportunity to use it.
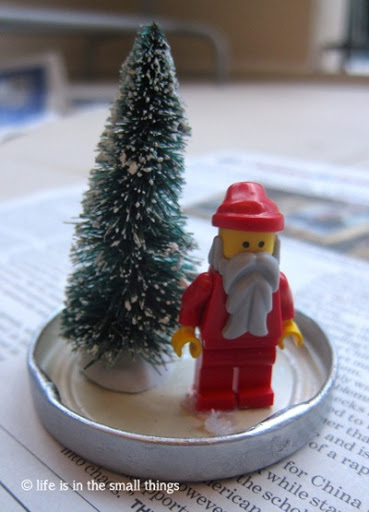
3. Position your figurines/ornaments on the inside of the lid and glue them down with hot glue. (I’ve been told that super glue is a good alternative if you don’t own a glue gun.) Leave aside to dry.
4. Pour some glitter into the glass jar.
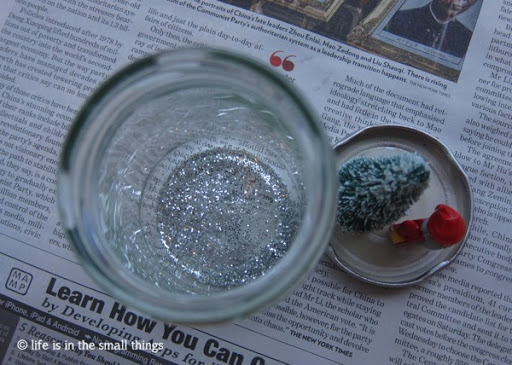
5. Fill the jar almost to the brim with water.
6. Screw on the lid of the jar tightly, taking care to lower the glued on items carefully into the water.
7. Turn the bottle around upside down and shake! Your snow globe is done! We tied a decorative ribbon on it near the top just for fun.
(After finishing the project, I popped in an extra red bauble that I left unglued to float up to the top of the snow globe and take up some of the extra dead space, so feel free to play around with it.)
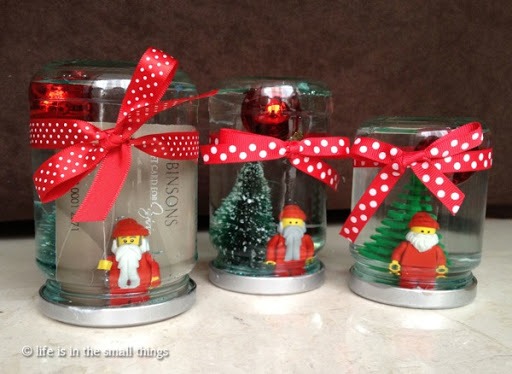
If you’re wondering, yes, the bottle on the left contains a gift card. I was trying out an idea which I came across on Pinterest with gift cards packaged in snow globes. Such a lovely way to dress up a boring gift card, I thought. But DD was very doubtful about leaving a gift card in water, so I decided not to go ahead in the end and just gave the teachers the snow globes and gift cards separately.
Together with a simple thank you card we made with some of my Christmas scrapping paper which Noey picked out, it made a pretty cute gift. His teachers thought they were adorable. And I was glad that he could make something for them himself as a thank you gift, after all that they have done for him this whole year.
Noey was so happy to make these snow globes, I think we’ll be making a couple more of our own for the house, just for fun.
thanks for the idea, was planning to do this as well!! Pretty!
Yeah, it's a neat craft for Christmas! I'm glad it turned out well. Have fun with yours!
What a thoughtful and novel thank you gift for the teachers! Thanks for sharing, will get Dana to make one too 🙂
Thanks! Have fun with it! 🙂
I really really love this idea!! it's so cool! 🙂
It's pretty easy too! Maybe another playdate idea 🙂
Have been planning to do this too! Love the ones you made. I've read that some glycerin can be added so the glitter falls more slowly.
Thanks for the tip Delphine! I'm definitely going to try get some and see if it works!
Looks so pretty!!
hi, it's beautiful! may i know where did you get the snowey christmas trees and the baubles? thanks! – WT
Hi there, I got them from Robinsons! The tree isn't the best choice tho cos it bled and turned the water blue at first. Had to rinse it till it was clear! Have fun with different ornaments 🙂
thank you so much 🙂 it's such a joy to read your blog aways :)- WT
Awesome idea! 😀